
Many thanks to Daria for her original idea, and for permission to share this tutorial with you. ❤
Bows are definitely *having a moment*.
Last year I made Brooklyn's Patchwork Quilted Bow, and LOVED how it turned out. Then I saw @sarabquilts and @sharacrane sewing up piles of these tiny bows, I literally SQUEALED with delight.
So smol! So cute!
I decided I needed to make one ASAP, and that my upcoming retreat was the perfect place to try this project.
I was not surprised to learn that several of us had these on our "to make" list. We started with Daria's pattern, but then Kristen suggested a size modification, Emily found a way to sew it all by machine, and I simplified one of the techniques.
The result is a little bit different from Daria's original design, but still comes together in a flash, and looks so SO cute hanging from a bag.
Back to retreat: Meg provided us with the tiny clasps, and Kristen let us borrow her hot glue gun. It was a real team effort, and we had lots of them completed in no time.
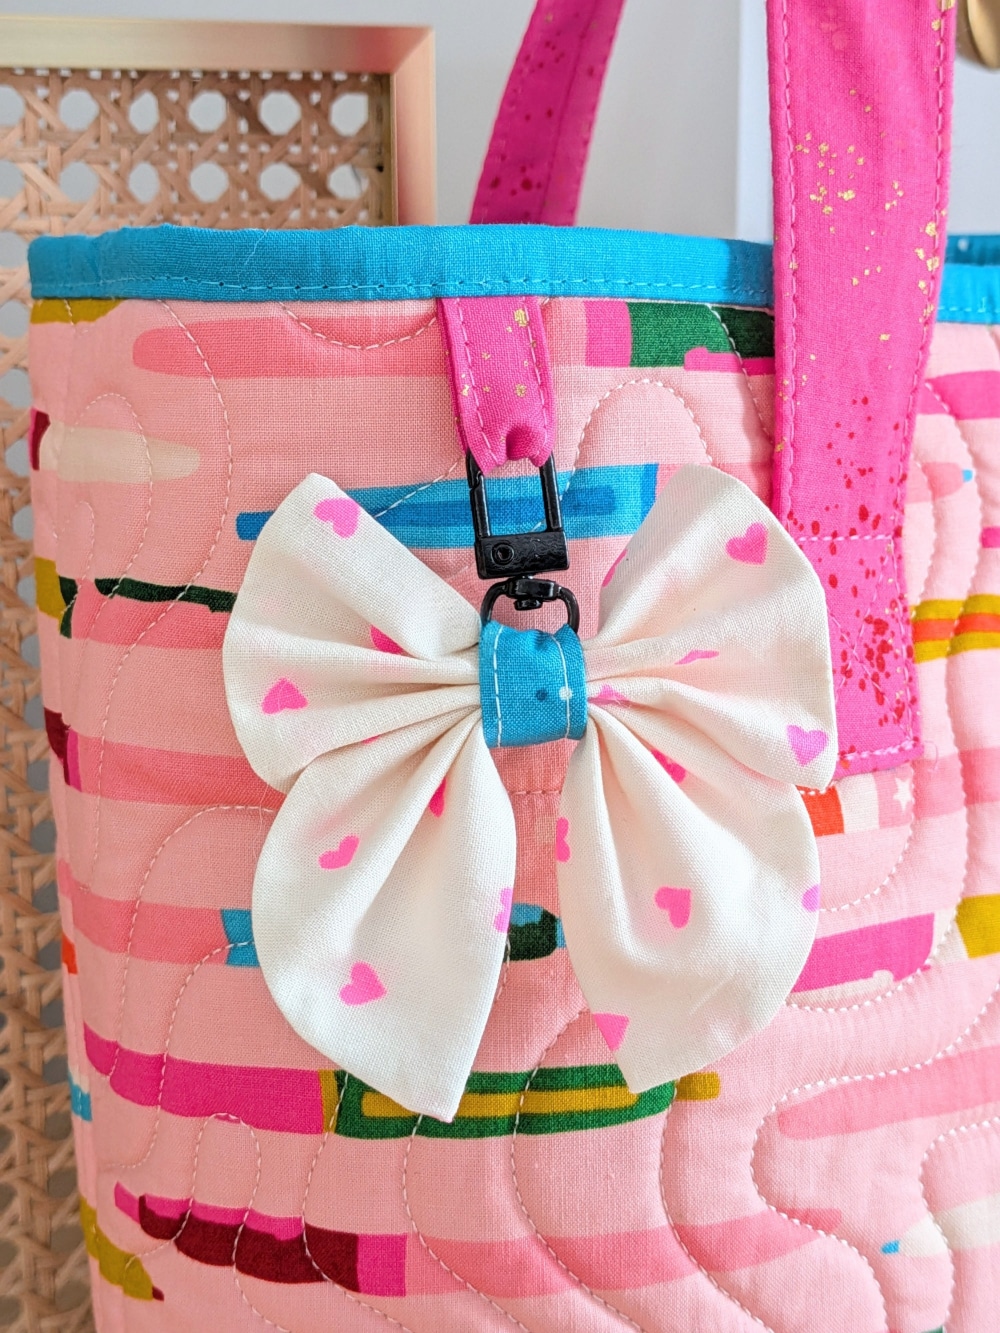
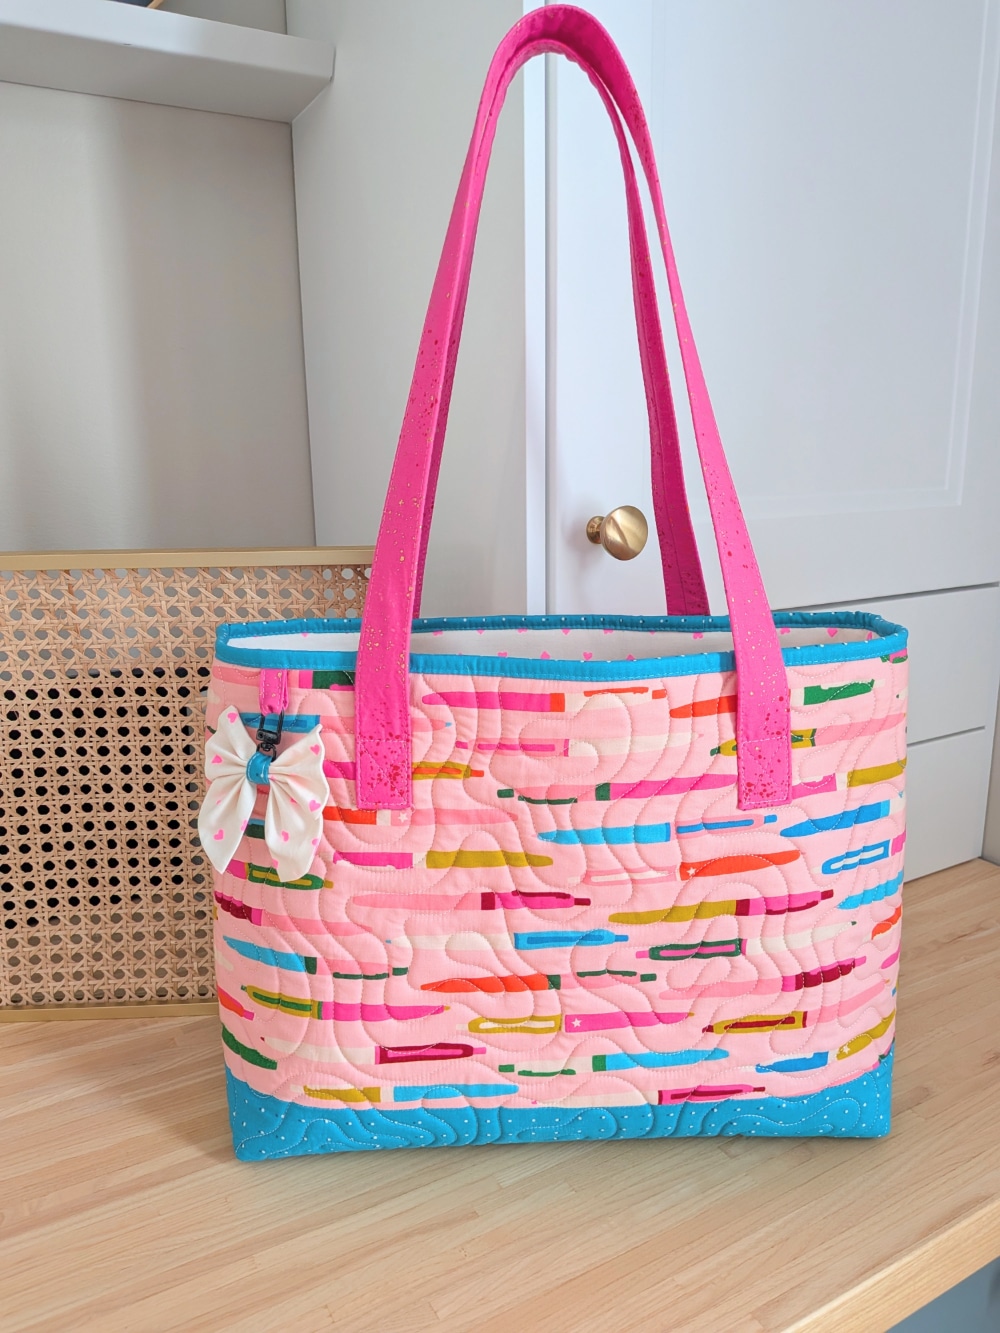
I was so delighted with these tiny bows that I specifically modified the Divided Tablet Tote pattern (releasing May 2026) to add a hanging tab.
Now every bag needs a coordinating bow! 😊
Tiny Bow Tutorial
Want to make one of your own? Follow along with the steps below, or download the PDF instructions for future reference.
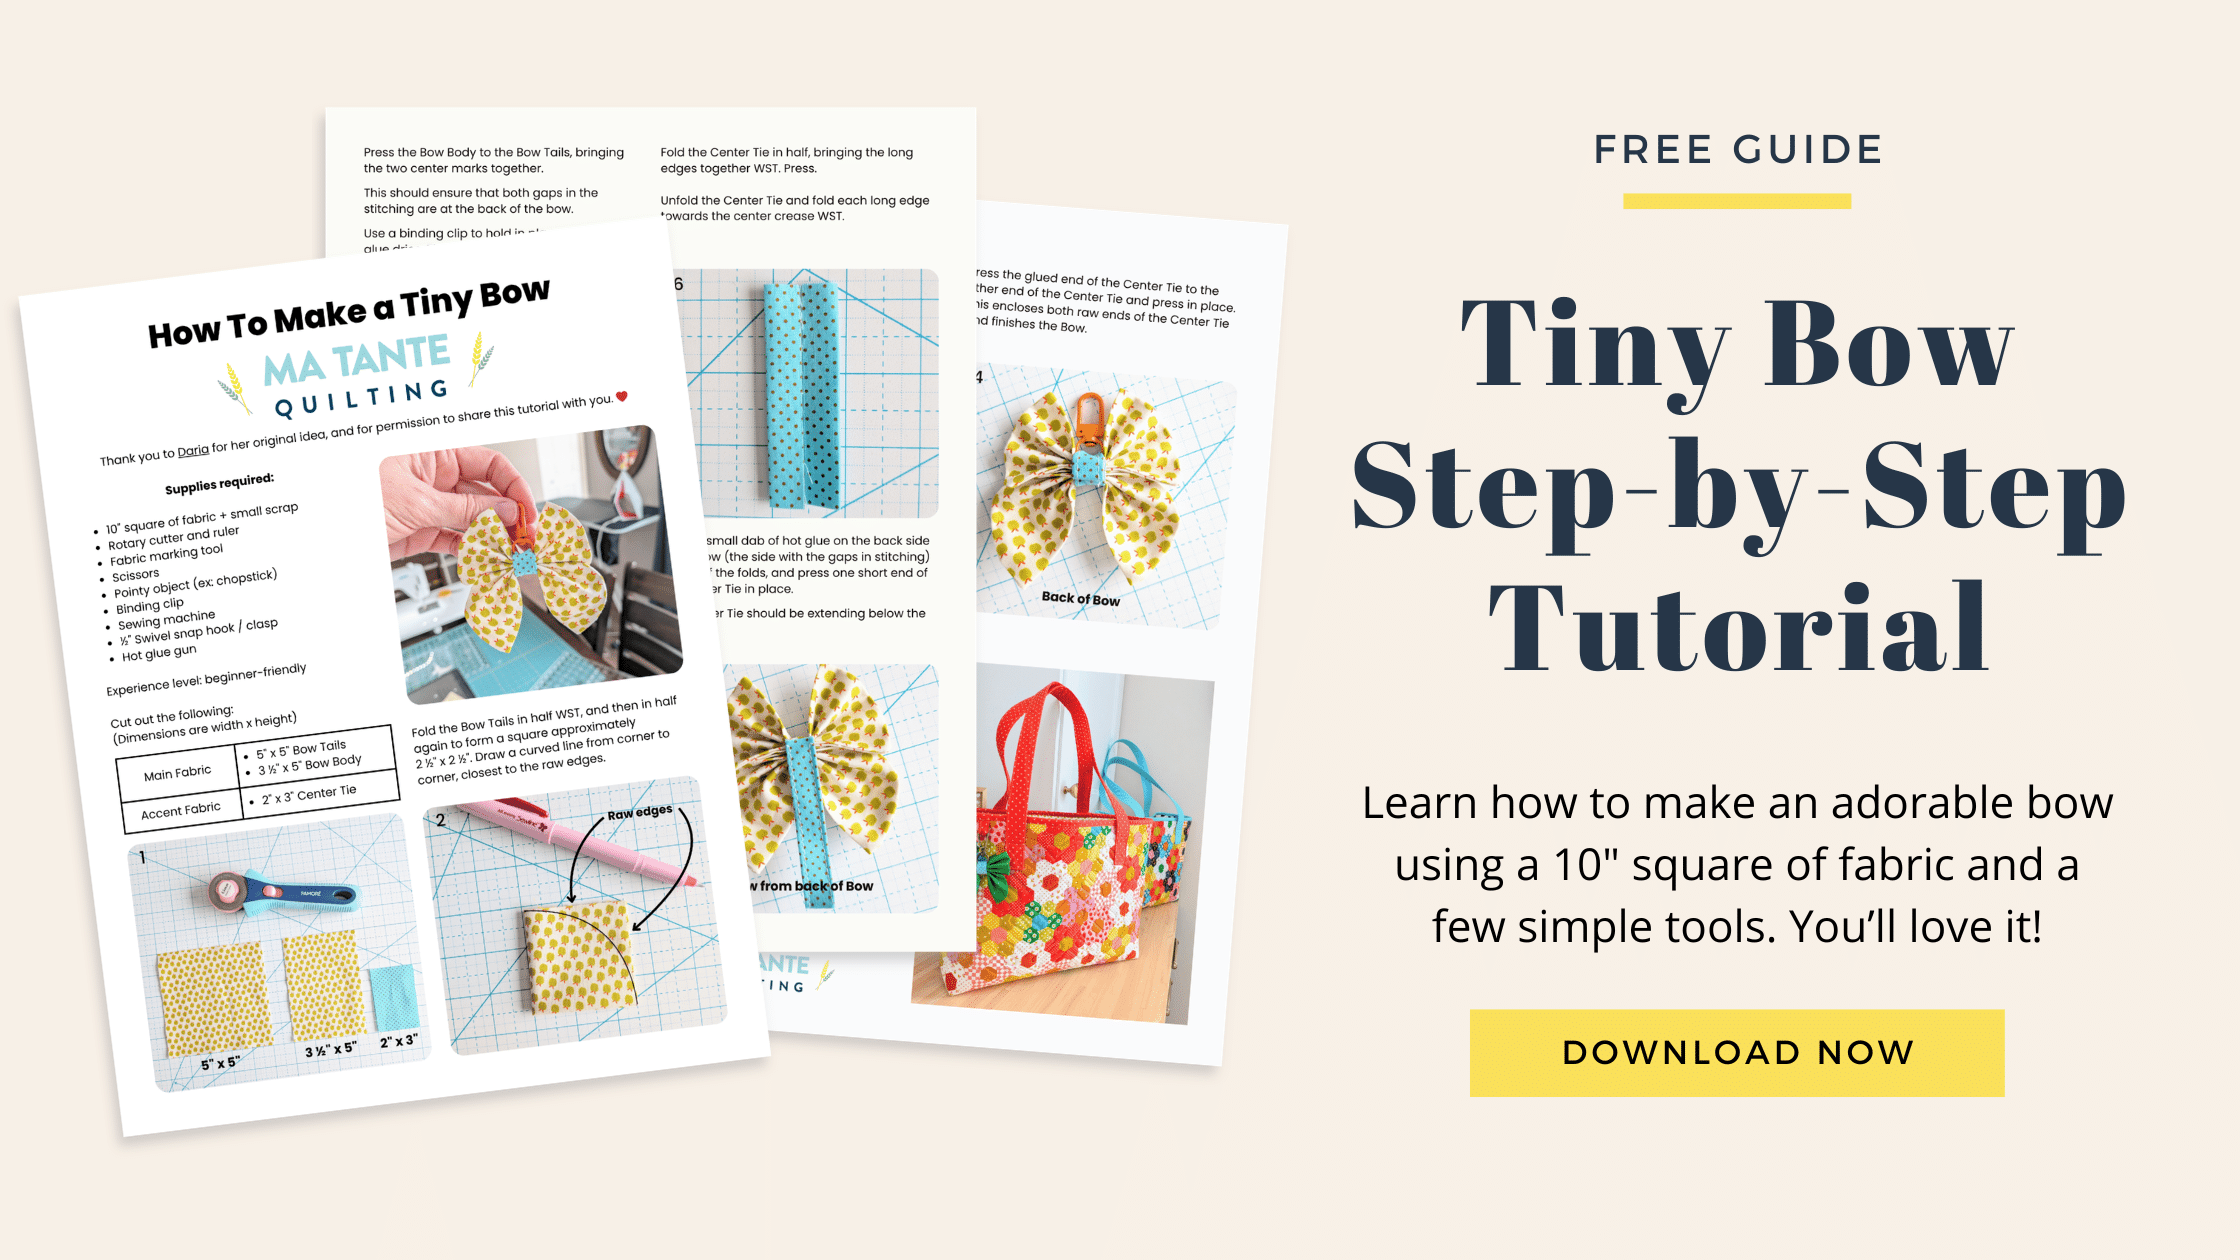
Supplies required:
- 10" square of fabric + small scrap
- Rotary cutter and ruler
- Fabric marking tool - I like SewLine's Air Erasing Pen
- Scissors
- Pointy object - I have a Purple Thang, but a chopstick will also work
- Iron
- Binding clip
- Sewing machine
- ½" Swivel snap hook / clasp - see below for details
- Hot glue gun
You'll probably have to order the swivel snap hooks. I bought these ones on Etsy (they ship from China), and these are the ones Meg shared with us at retreat. Emmaline Bags (in Canada) sells a different style, and a few ladies bought these ones from Stitch Supply Co while at retreat.
Don't overthink this purchase - just add to cart and get on with it! 😉
Skill level required: beginner-friendly
Cut Fabric
Using a rotary cutter and ruler, cut out the following:
(Dimensions are width x height)
Main Fabric:
- 5" x 5" Bow Tails
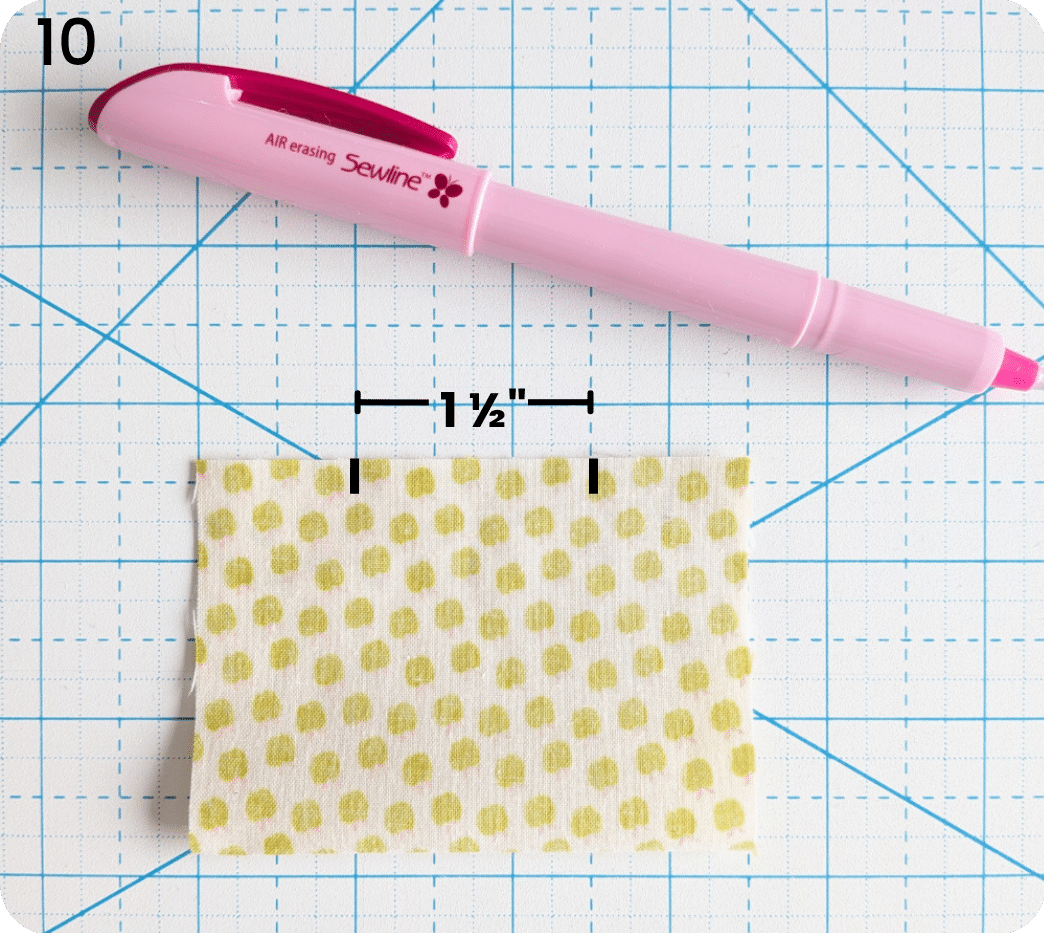
- 3 ½" x 5" Bow Body
Accent Fabric:
- 2" x 3" Center Tie

Create the Bow Tails
Fold the Bow Tails in half WST, and then in half again to form a square approximately 2 ½" x 2 ½".
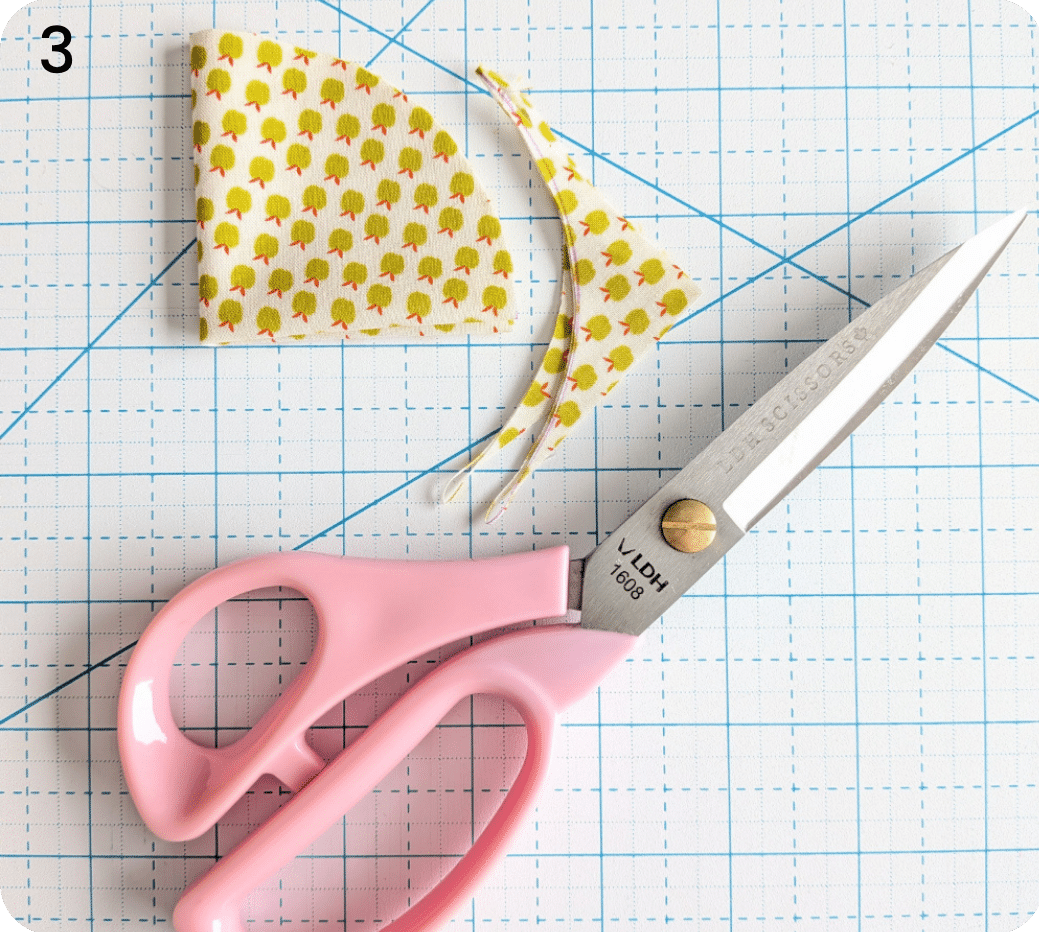
Draw a curved line from corner to corner, closest to the raw edges.

Cut the curve using scissors, being careful not to cut off either of the folded edges.
This will create a circle.
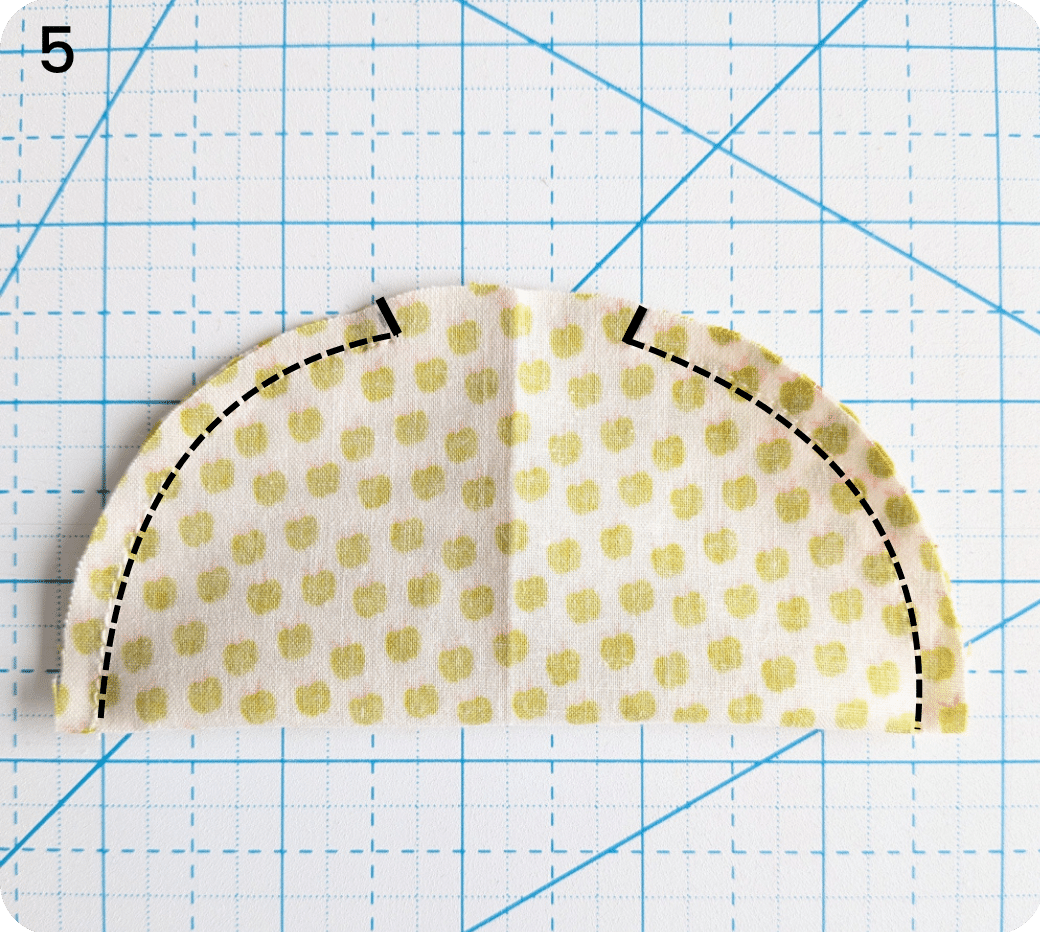
Fold the circle in half RST and mark lines approximately ¾" away from the vertical fold.
The lines will be 1 ½" away from each other.

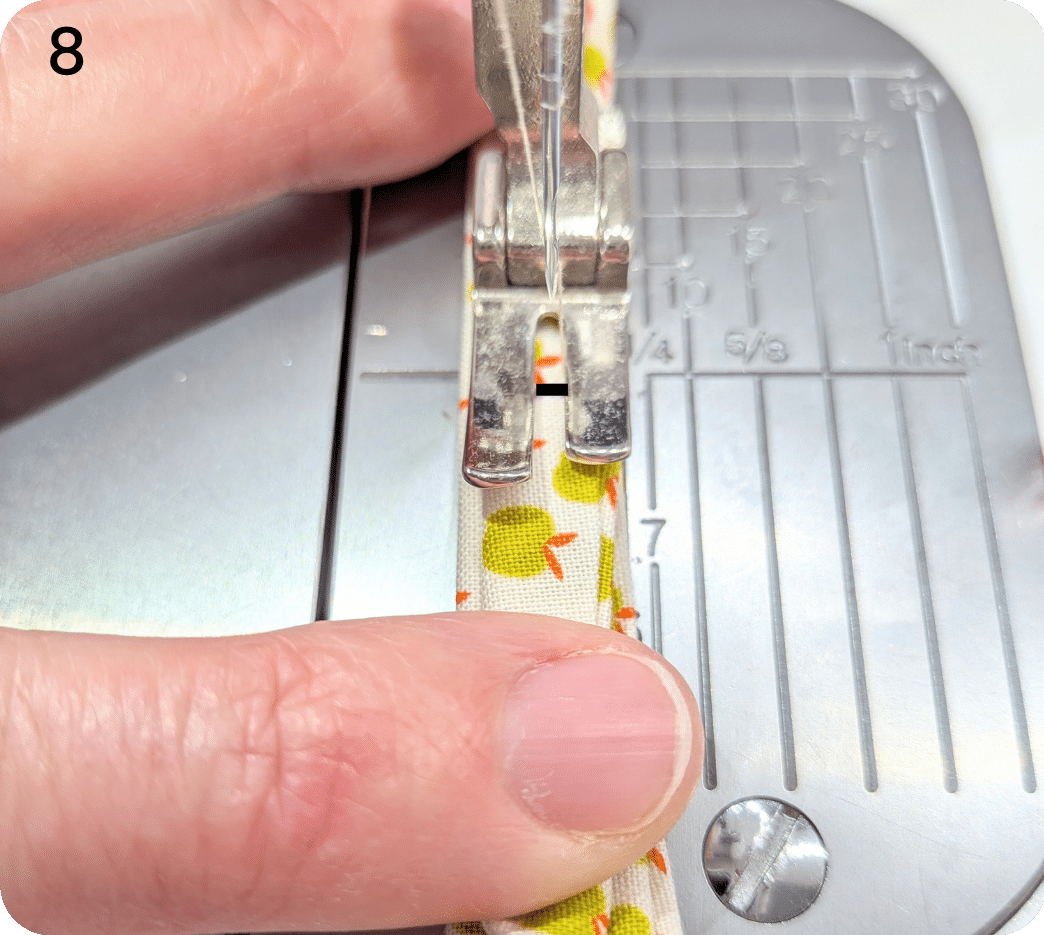
Sew ¼" away from the raw edges of the semi circle, leaving a 1 ½" gap between the marks.
Backstitch at the start and end of the gap to secure the stitches.
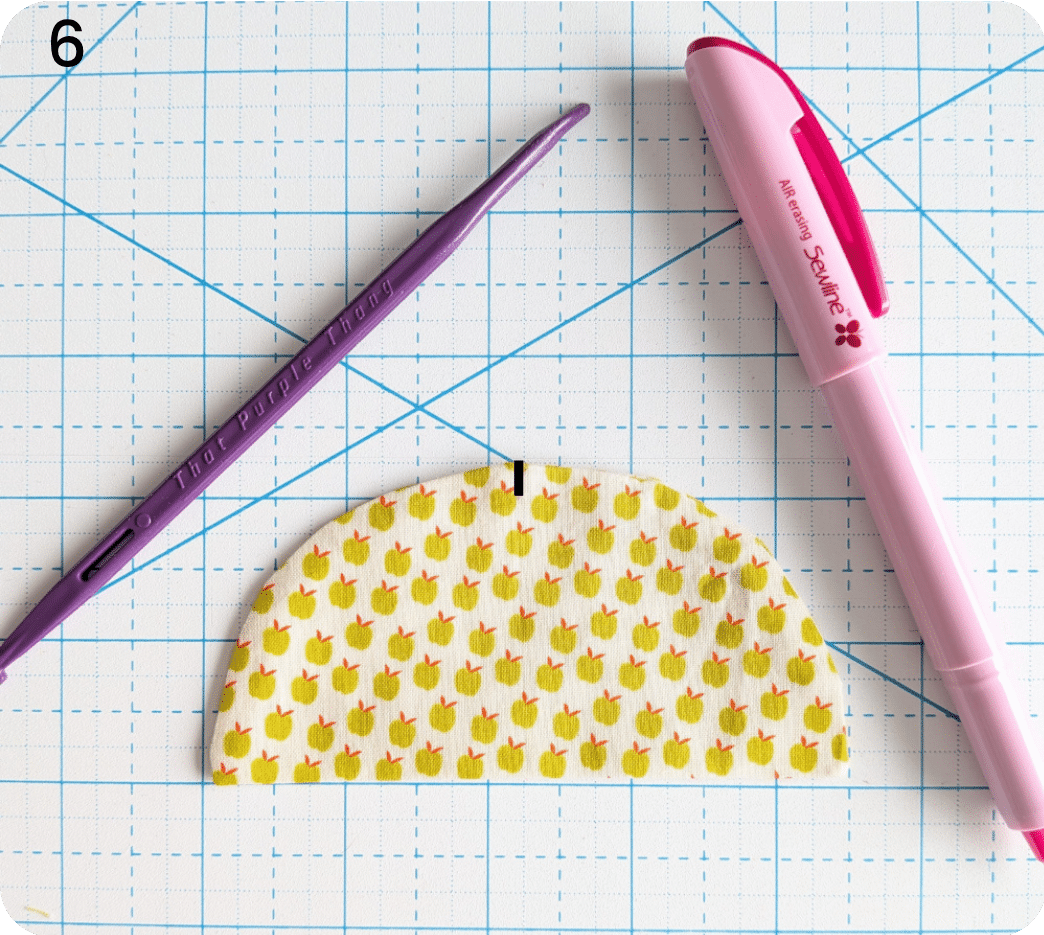
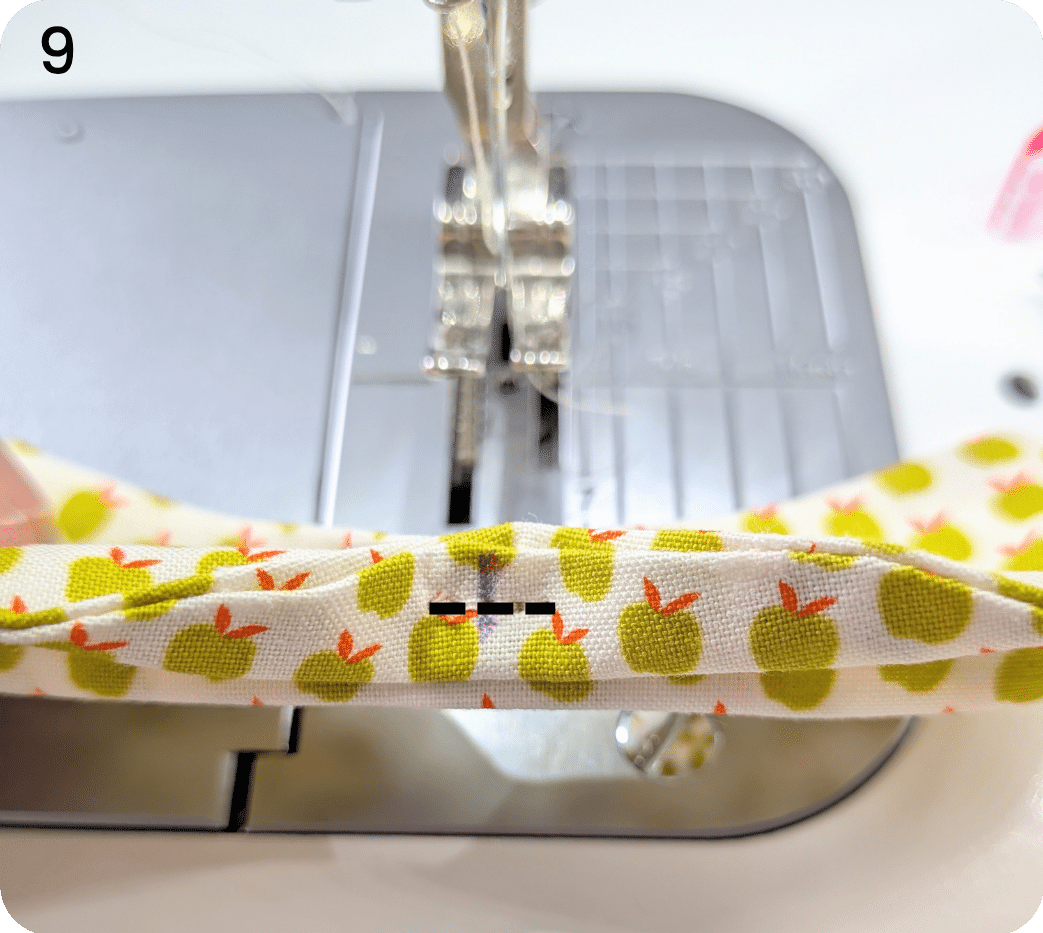
Turn the semi circle right side out, using a chopstick or other pointy object to carefully push out the corners.
Use your fingers to tuck the fabric between the gap towards the inside. There is no need to stitch the gap closed. Press.
Mark the center of the arc along the curved edge.
Create several accordion-style folds along the long edge of the semi circle, making sure that the gap in stitching is towards the back.
Hold in place using a binding clip.
With the center mark on top, bring the Bow Tails to your sewing machine and sew a few stitches, securing all the folds in place.
If this is too many layers for your sewing machine, you can always hand stitch it.
Set aside for now.
Create the Bow Body
Fold the Bow Body in half RST, bringing the short edges together.
Mark a gap approximately 1 ½" along the top raw edge.
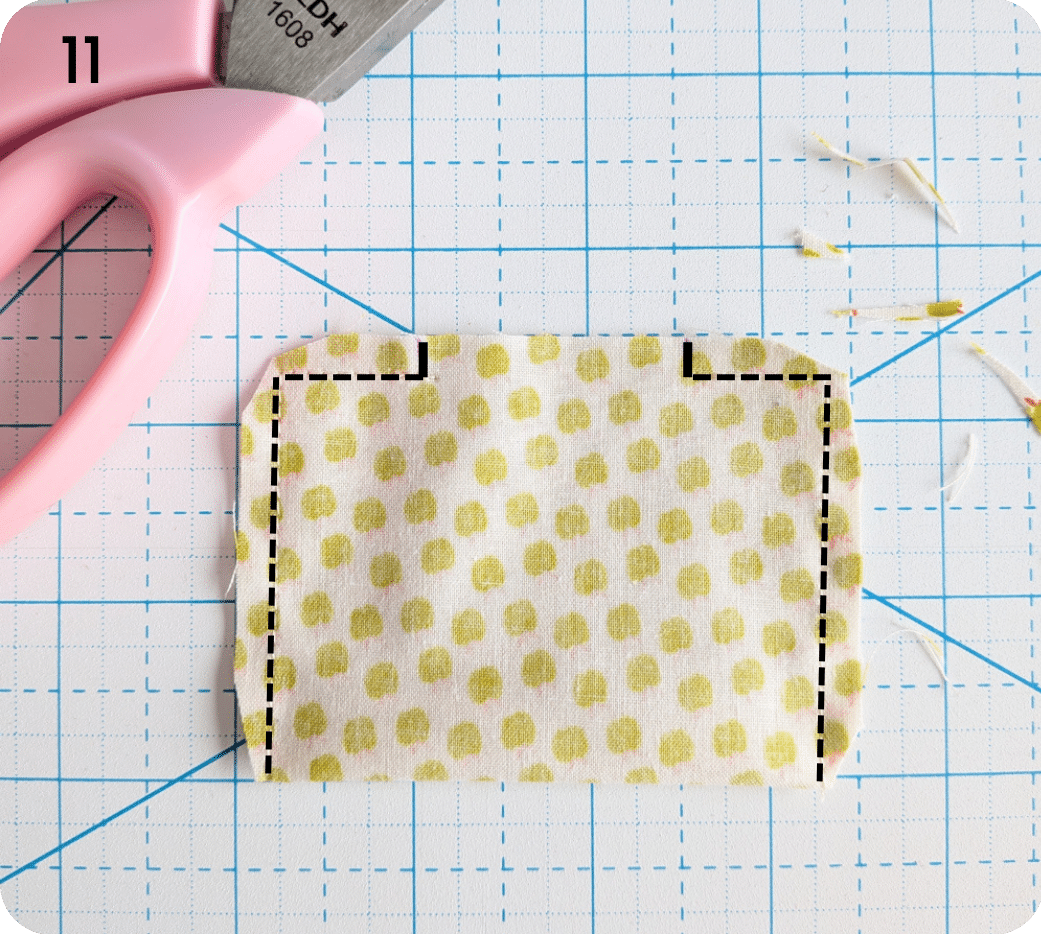
Sew ¼" away from the raw edges of the rectangle, leaving a 1 ½" gap between the marks.
Backstitch at the start and end of the gap to secure the stitches.
Trim the fabric near the corners using scissors, being careful not to cut into the seam allowance.
Turn the Bow Body right side out and use a pointy object to carefully push out the corners. Tuck the fabric between the gap towards the inside. Press.
Mark the center of the edge with the gap in stitching.
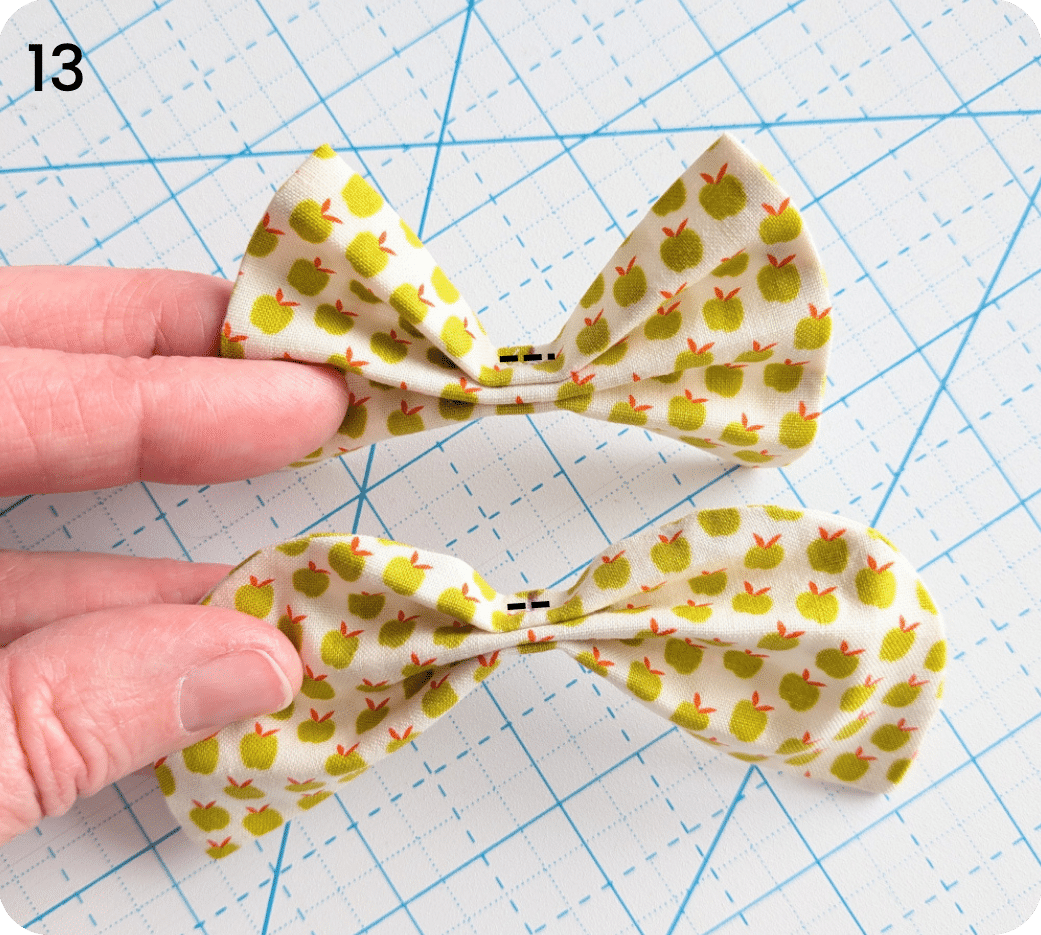
Create several accordion-style folds along the long edge of the Bow Body, making sure the gap in stitching is toward the back. Hold it in place using a binding clip.
With the center mark on top, bring the Bow Body to your sewing machine and sew a few stitches, securing all the folds in place.
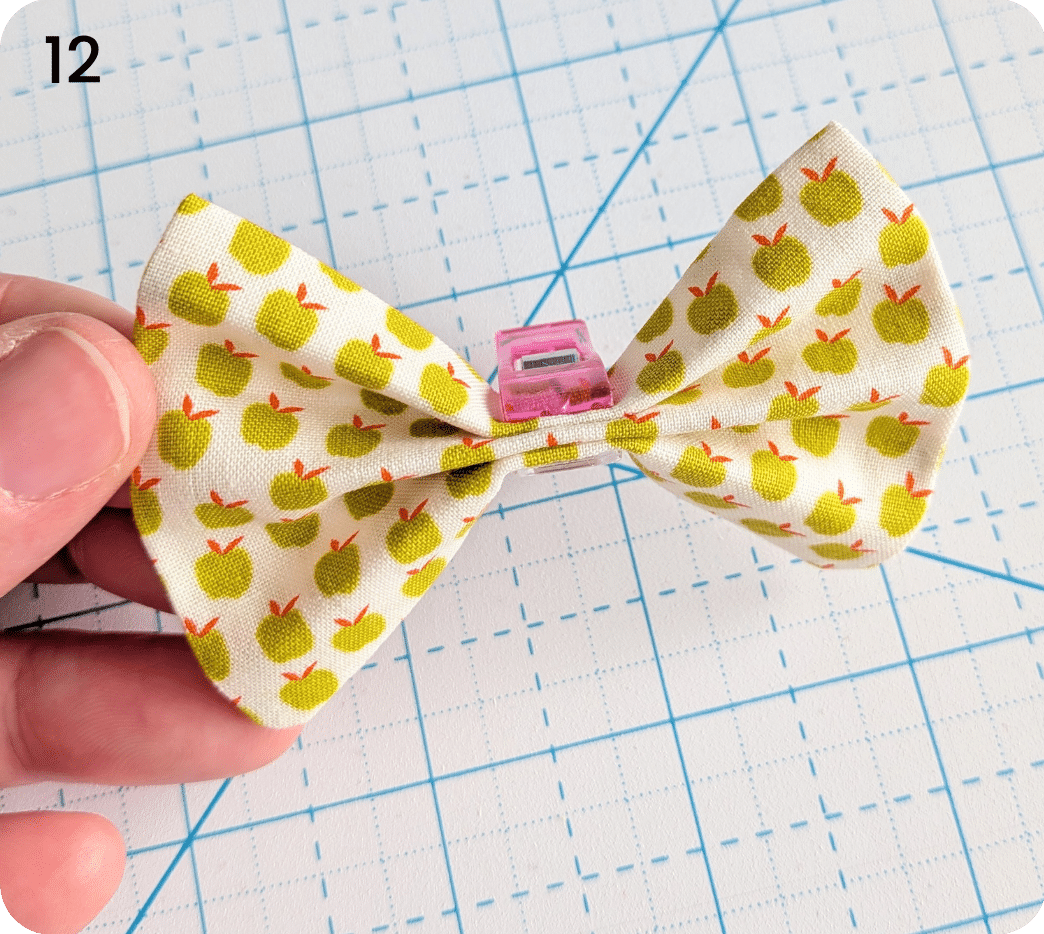
Both the Bow Body and Bow Tails will now have stitches securing their folds.
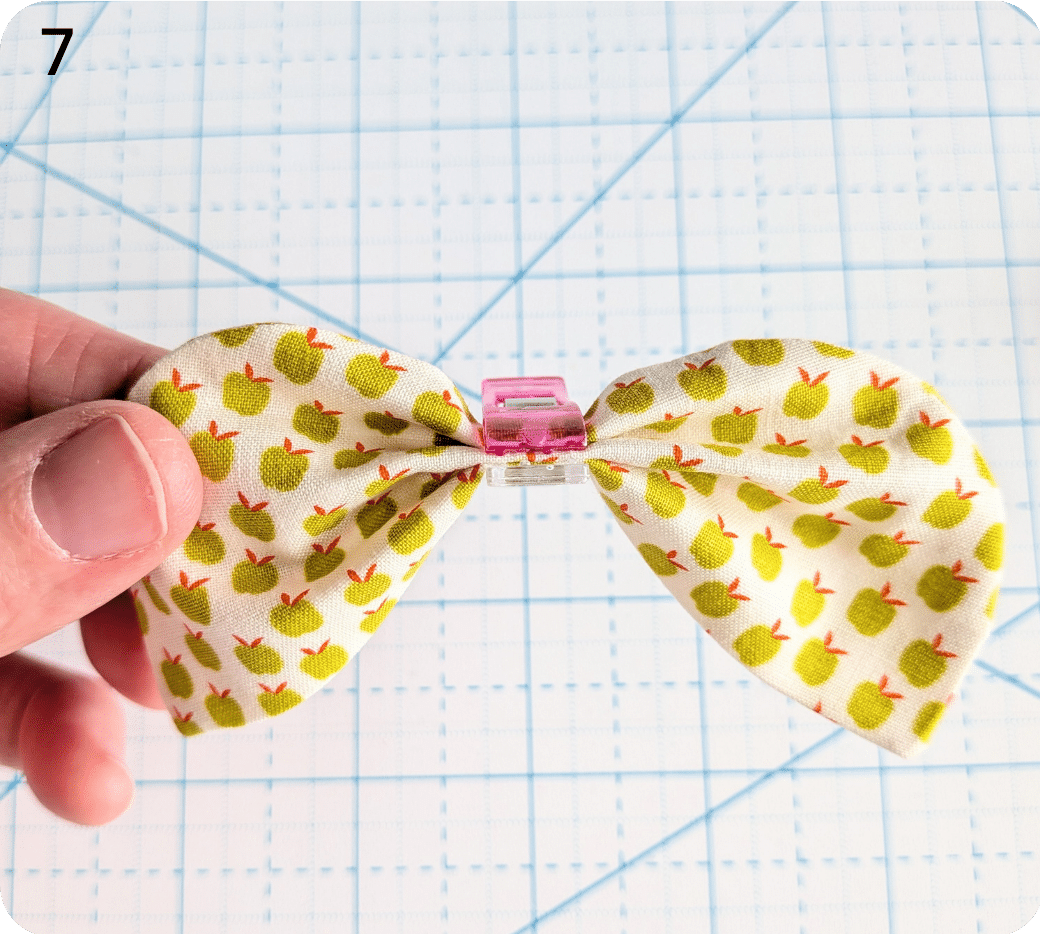
Place a small dab of hot glue on top of the center mark of the Bow Tails.
Press the Bow Body to the Bow Tails, bringing the two center marks together.
This should ensure that both gaps in the stitching are at the back of the bow.
Use a binding clip to hold in place while the glue dries. This is now called the Bow.
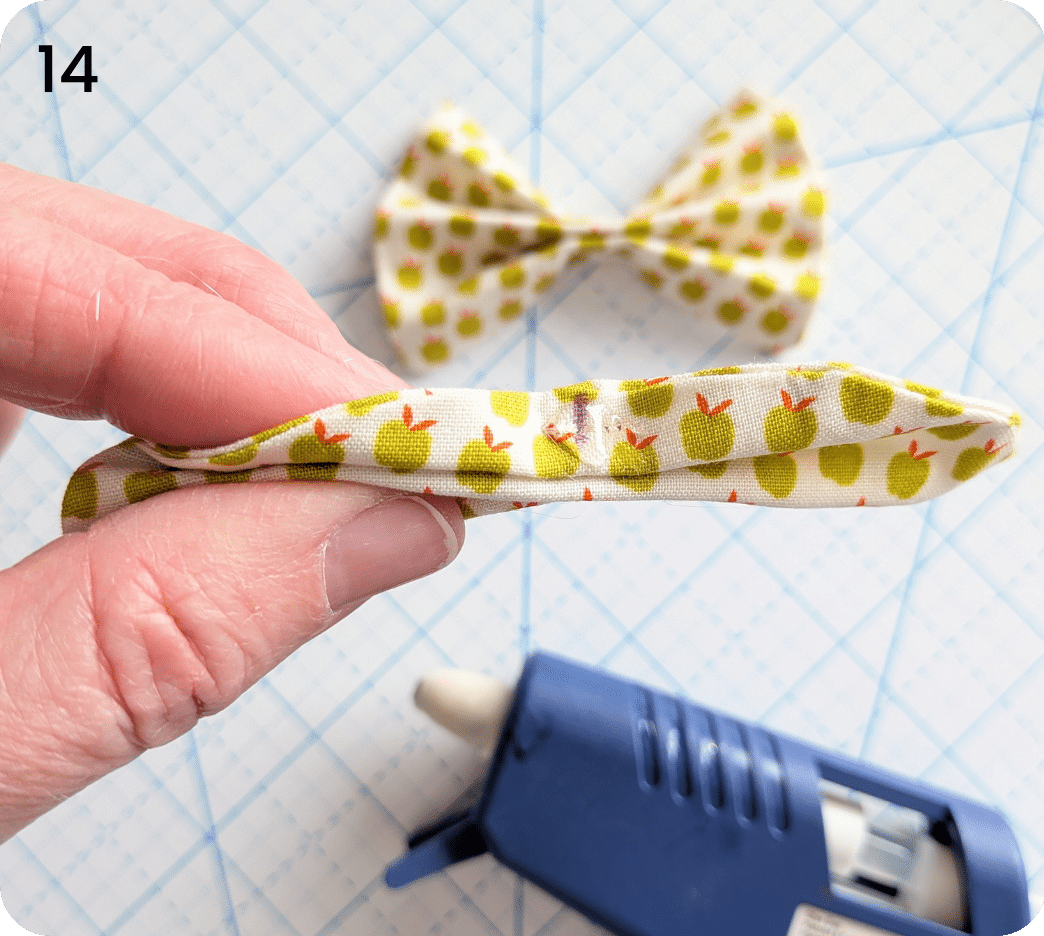
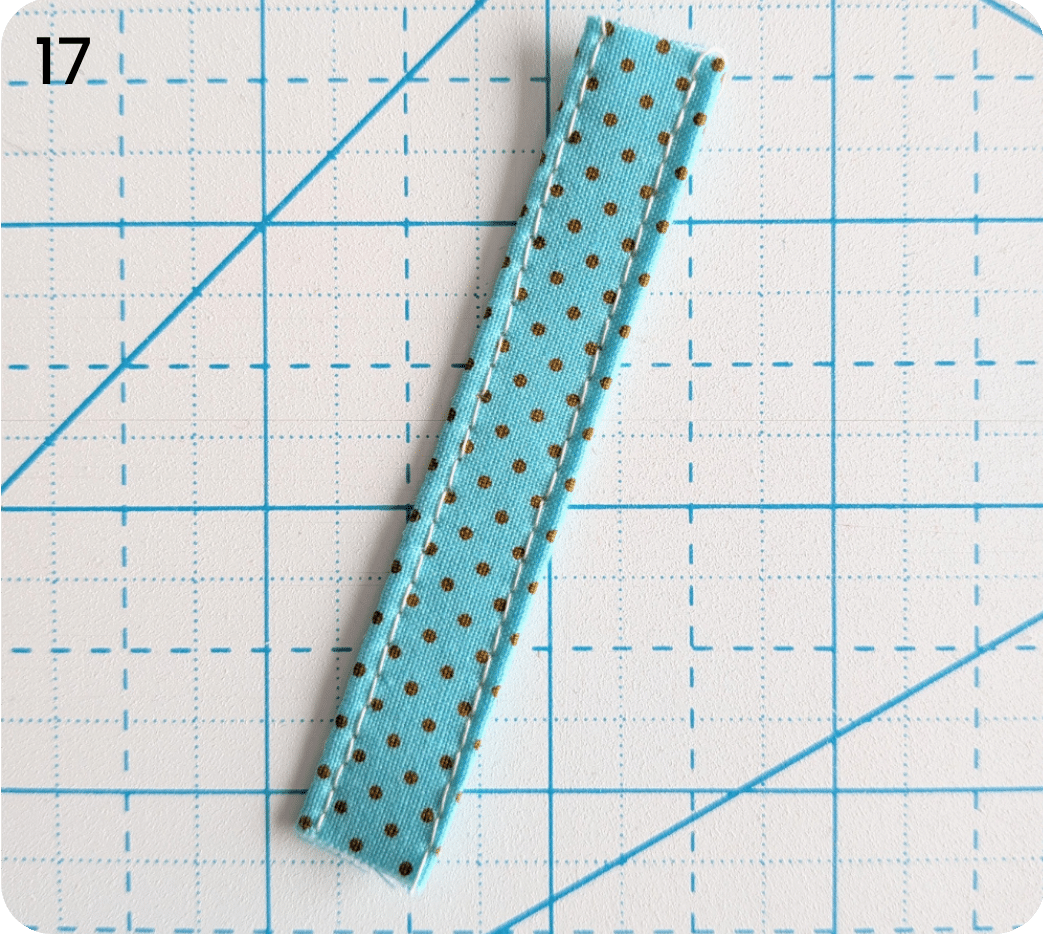
Create the Center Tie
Fold the Center Tie in half, bringing the long edges together WST. Press.
Unfold the Center Tie and fold each long edge towards the center crease WST.

Fold in half along the crease, bringing WST (hiding the raw edges). This will create a rectangle that measures ½" x 3".
Top stitch ⅛" away from the long edges of the Center Tie, or use hot glue if you’d prefer to have no visible stitches on your bow.
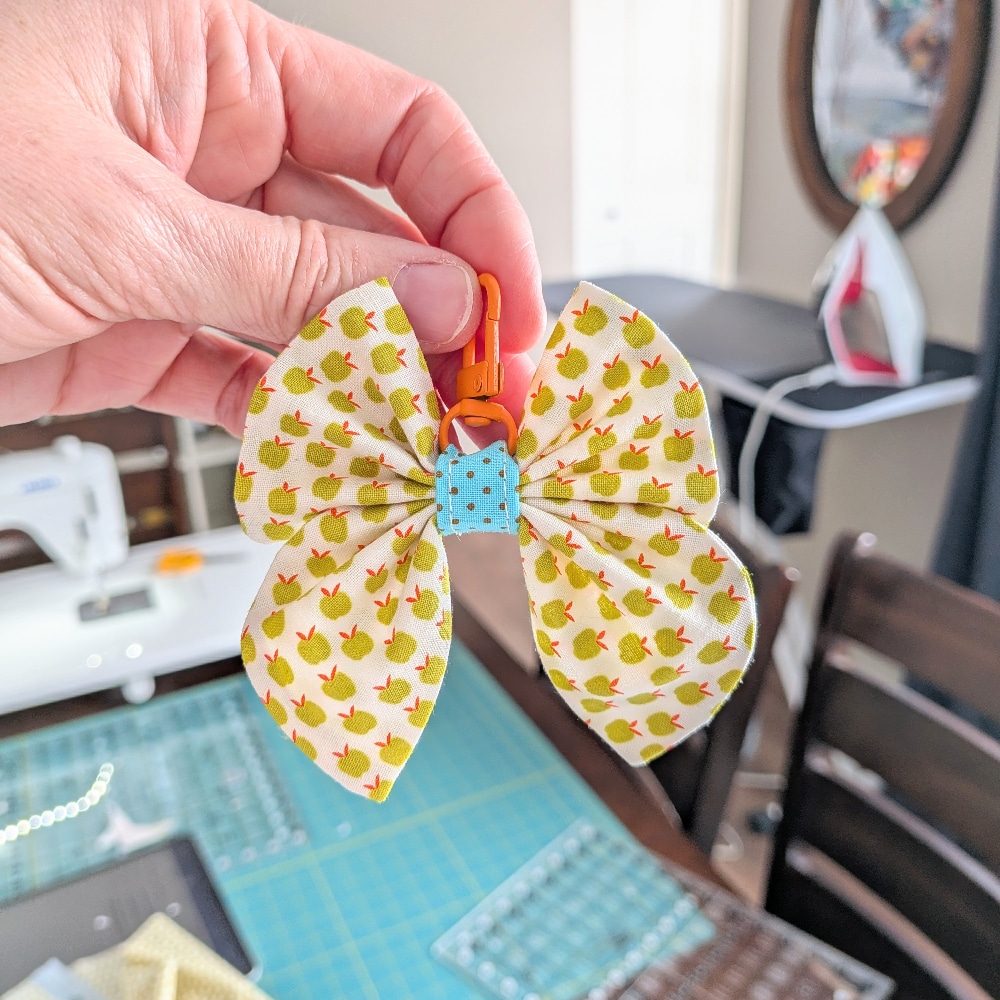
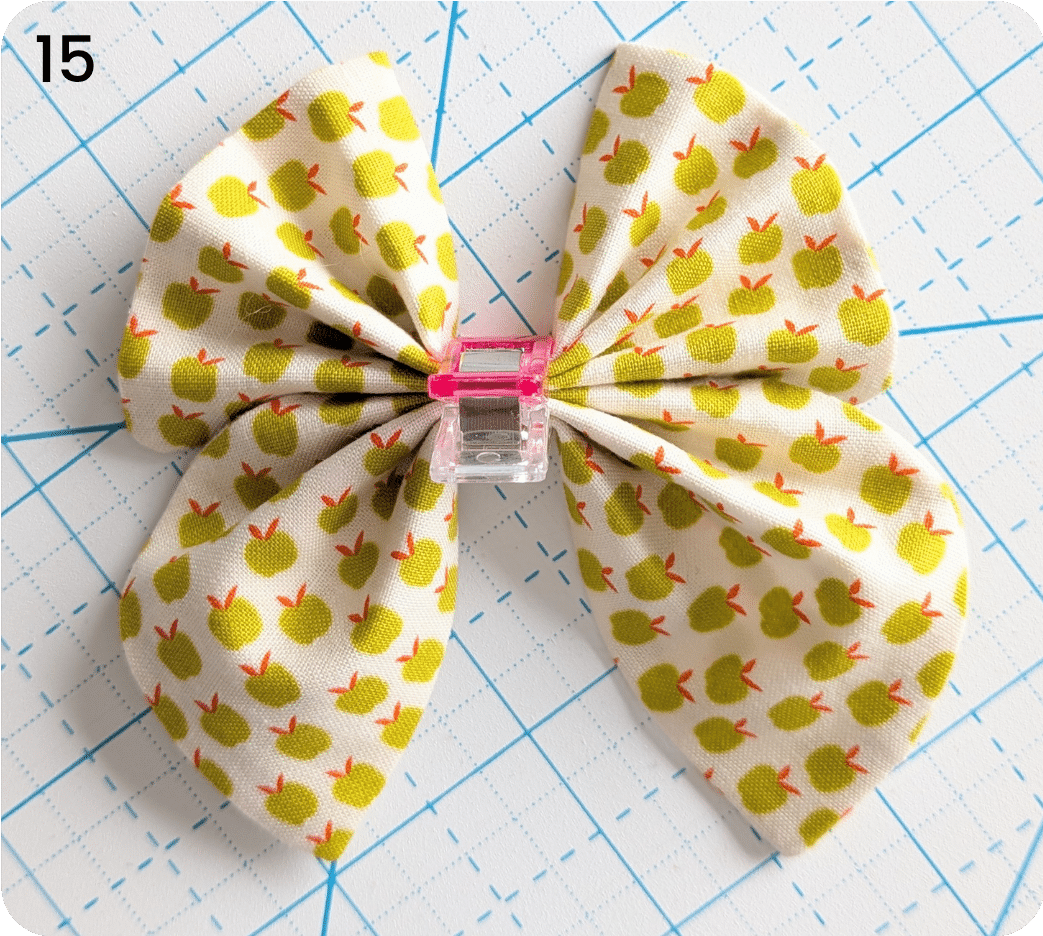
Create the Bow
Place a small dab of hot glue on the back side of the Bow (the side with the gaps in stitching) on top of the folds, and press one short end of the Center Tie in place.
The Center Tie should be extending below the Bow.
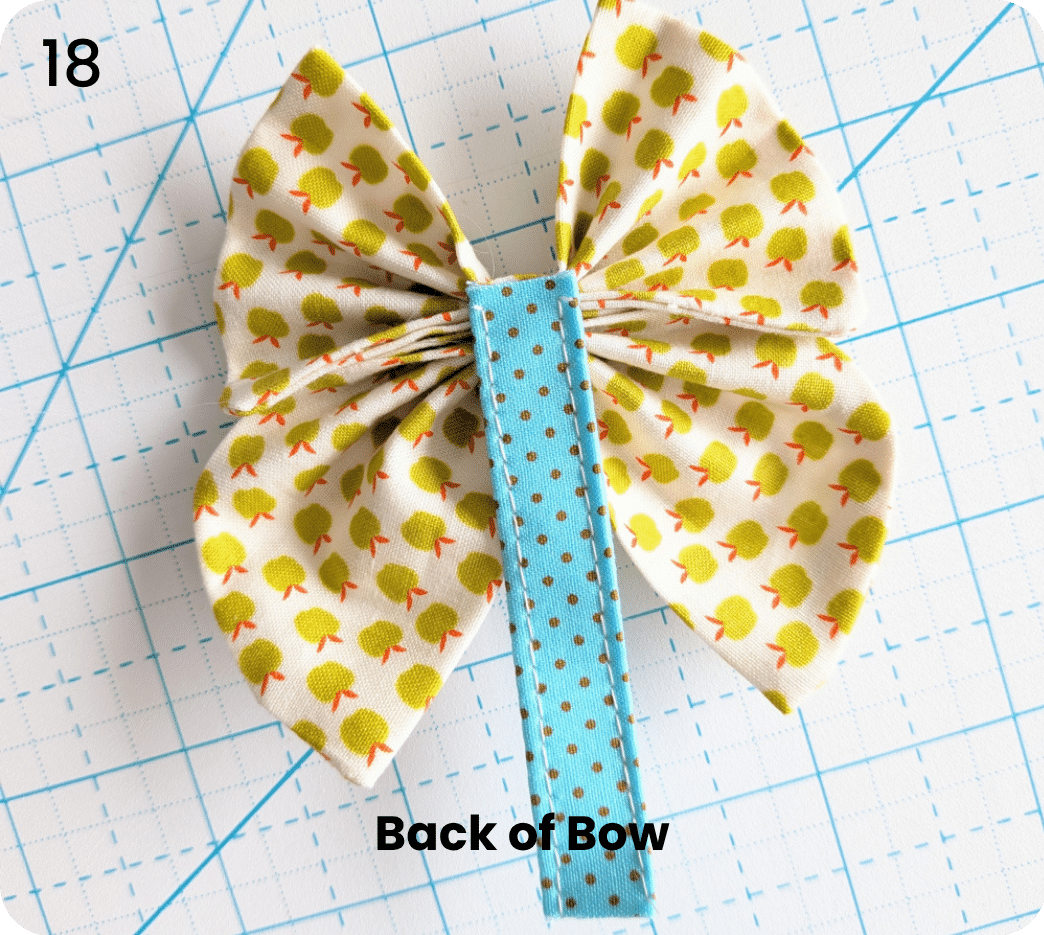
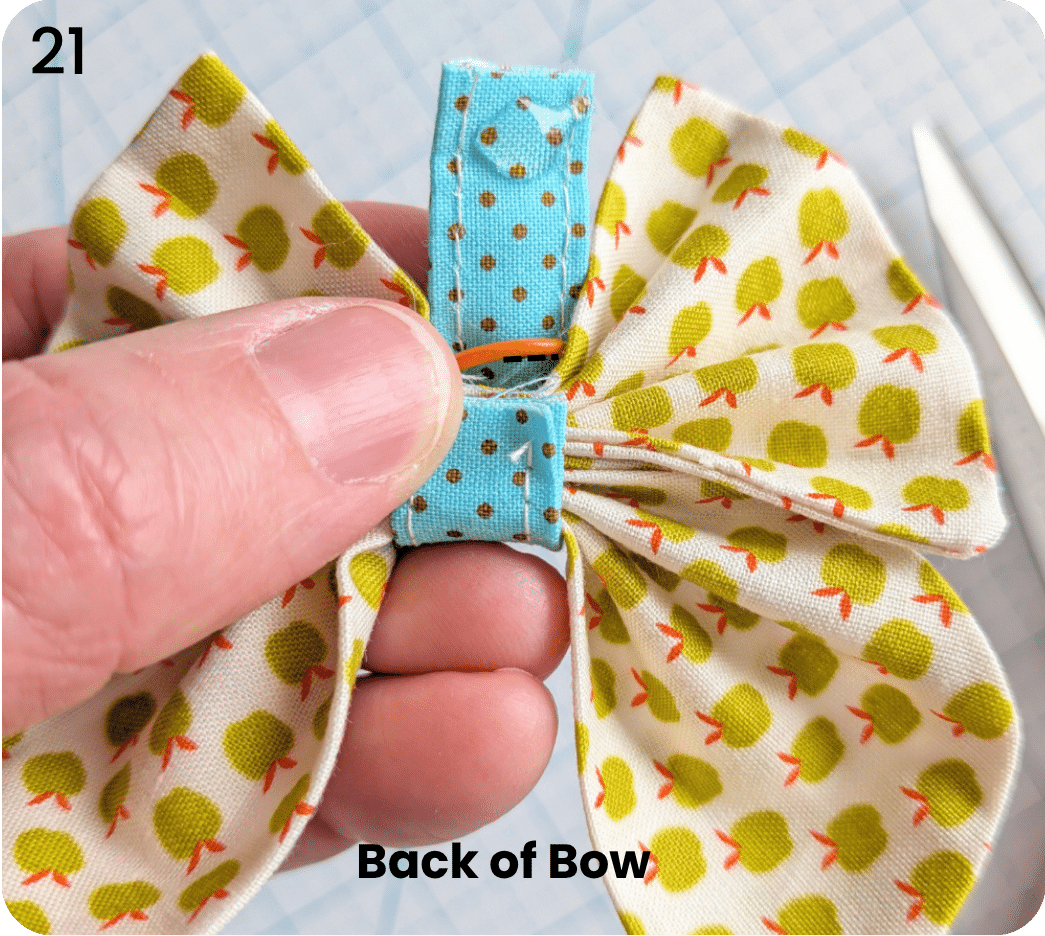
Wrap the Center Tie underneath the Bow Tails to the front of the Bow and thread a ½" clasp onto the Center Tie.
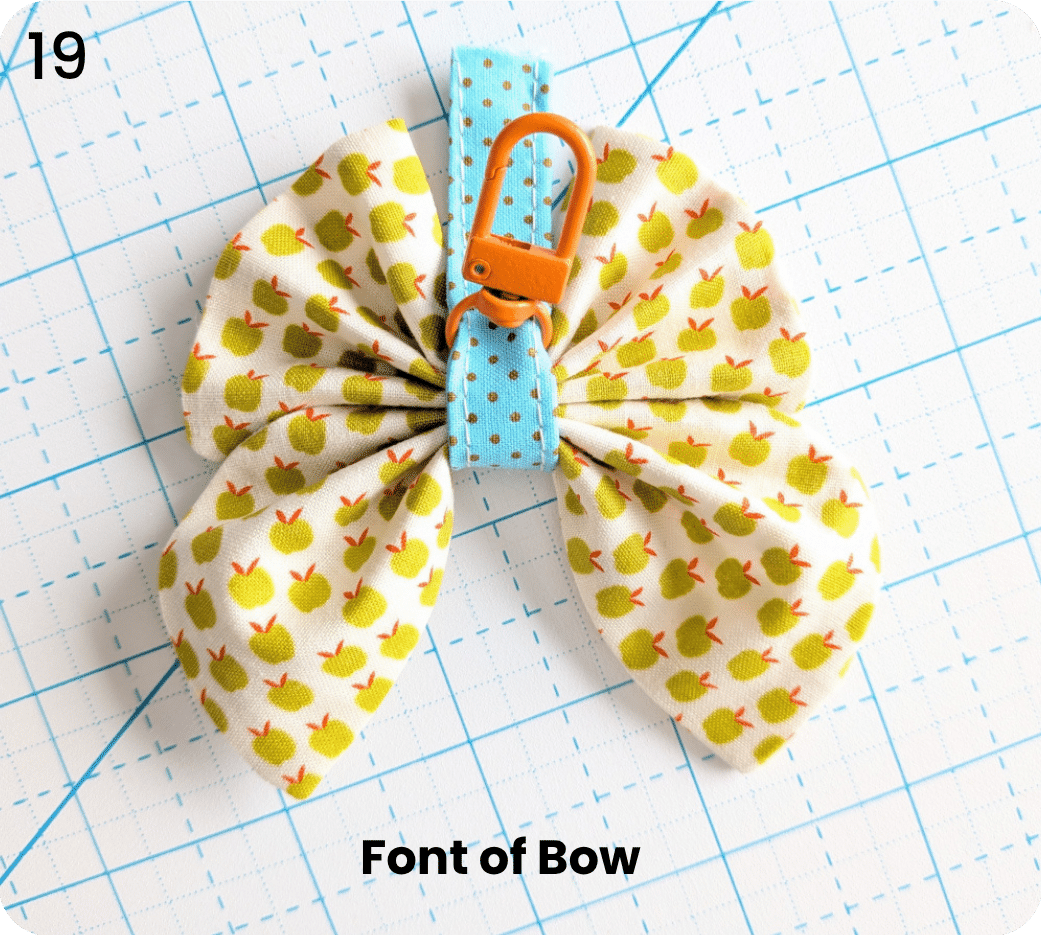
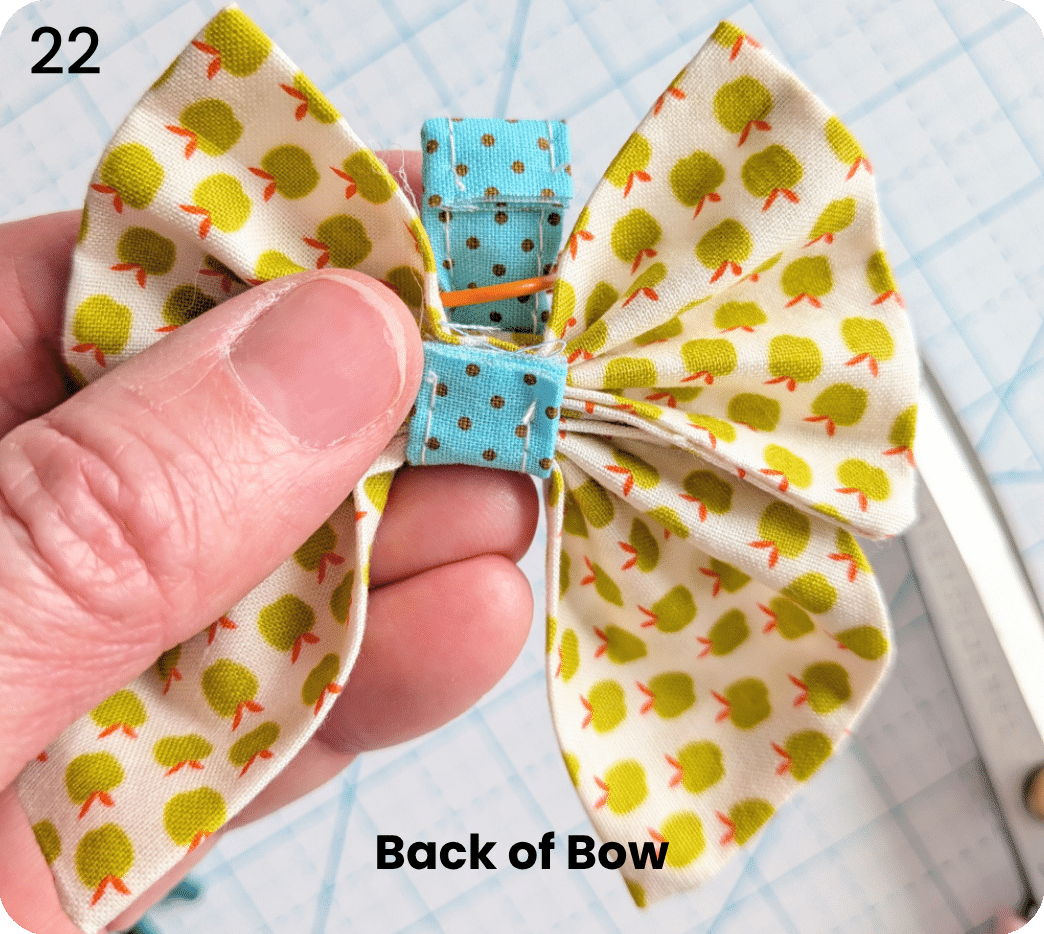
Use scissors to trim approximately ½" from the free end of the Center Tie.
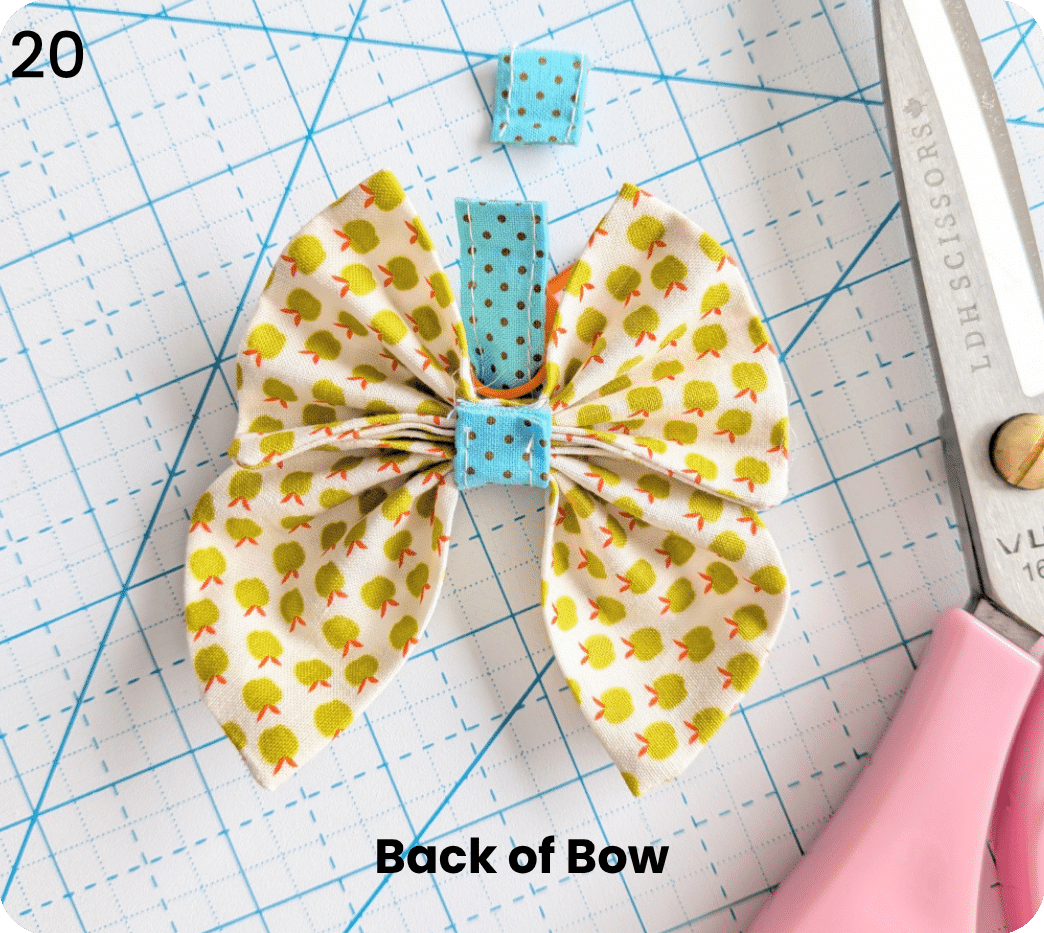
Place a small dot of hot glue along the free end of the Center Tie (on the back side of the Center Tie).
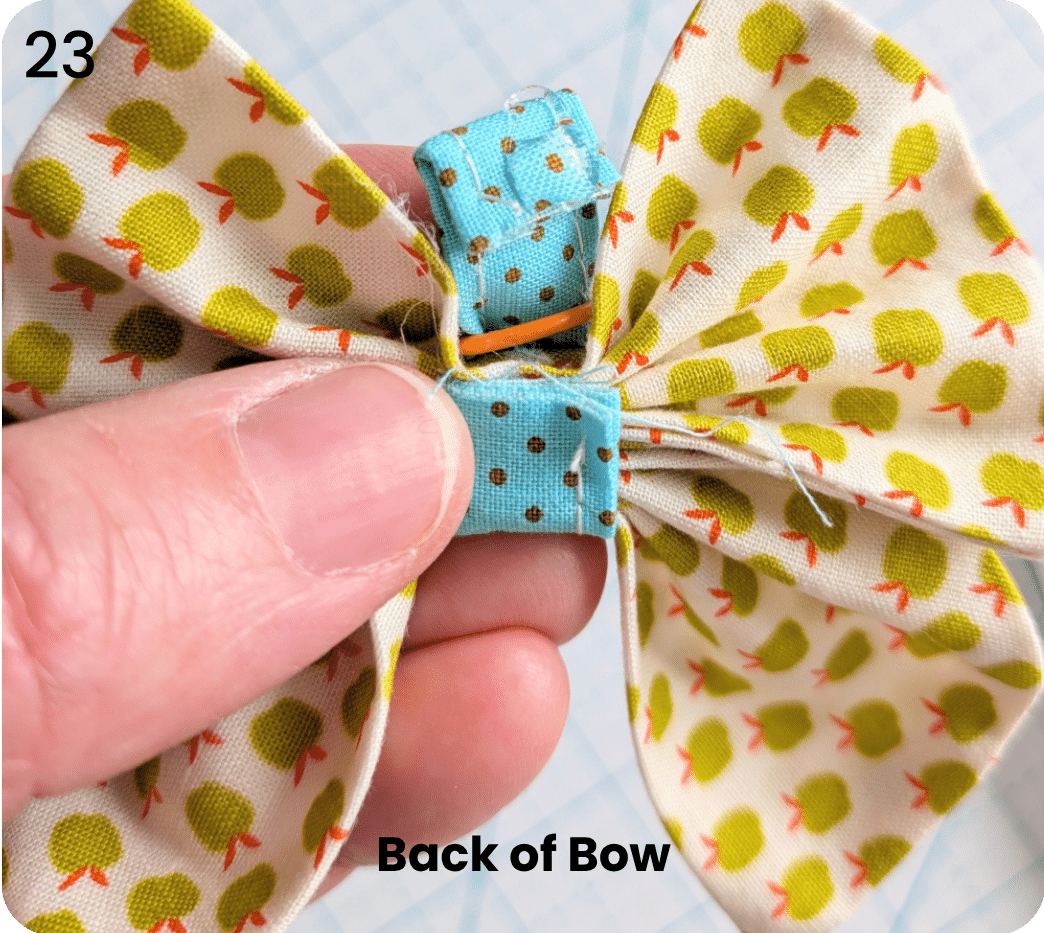
Fold the free end of the Center Tie on itself by approximately ½".
Place a small dot of hot glue along the folded short edge of the Center Tie.
Press the glued end of the Center Tie to the other end of the Center Tie and press in place. This encloses both raw ends of the Center Tie and finishes the Bow.
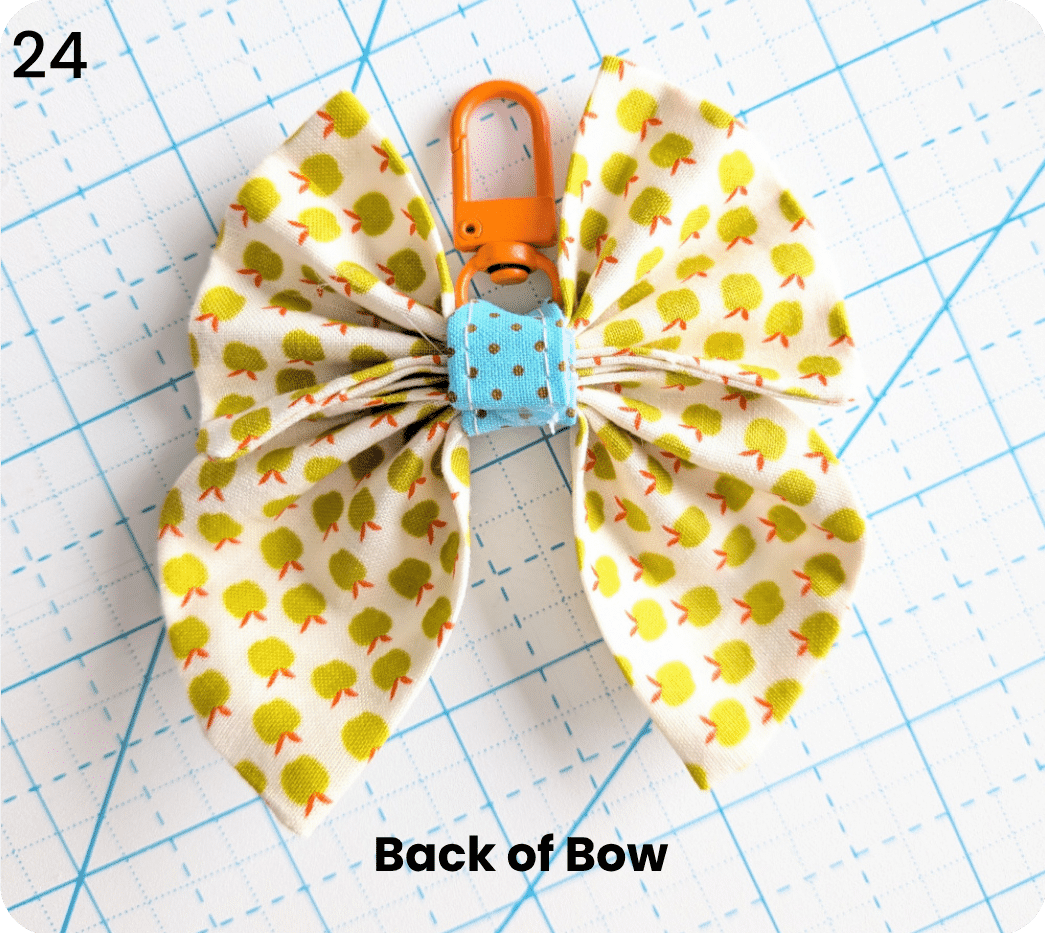
Tada! You’ve just made an adorable Tiny Bow!
Not sure what to do with it? I think it would look great hanging from a Divided Tablet Tote (releasing May 2026). Wink wink!
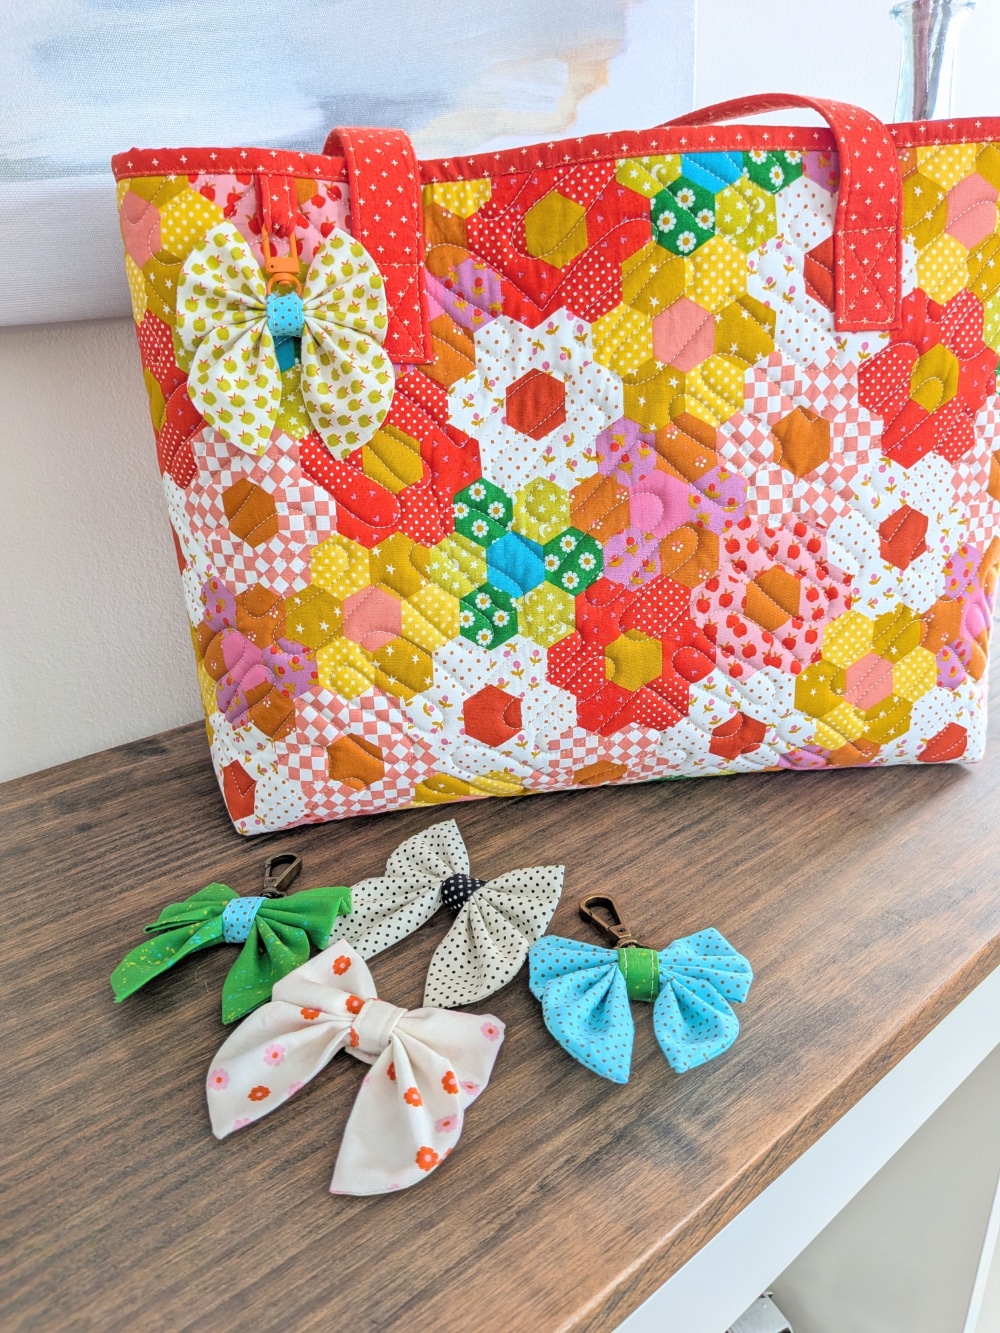
I specifically designed this bag with a hanging tab so you'd have a place to attach this cutie (or a bag charm, your car keys, hand sanitizer, or anything else your heart desires).
Want to save this tutorial for future use? Tap on the image below and I'll email you a PDF copy!
